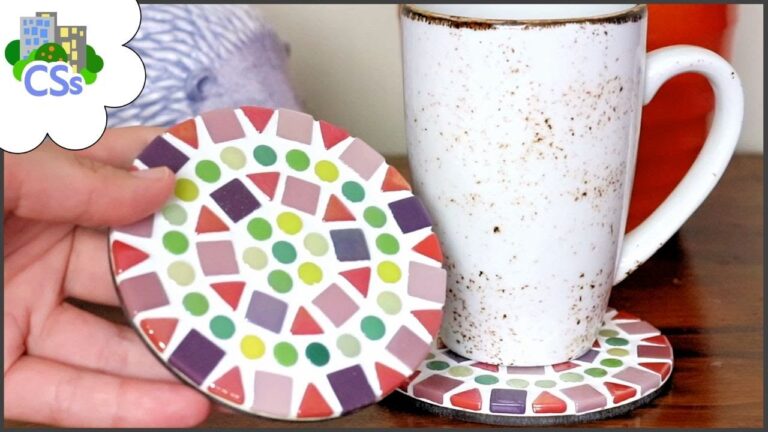
Looking to add a touch of creativity to your home decor? Learn how to make your own stunning mosaic coasters with this easy step-by-step DIY tutorial. With just a few simple materials and a bit of patience, you can create beautiful and unique coasters that will impress your guests and add a pop of color to any room. Follow along and unleash your inner artist with this fun and rewarding project!
What is the process for making mosaic coasters for beginners?
Create stunning mosaic coasters with these easy steps for beginners. Begin by choosing a design and outlining it on the coaster base if necessary. Next, cut the tiles into the desired shapes and glue them onto the base. Once the glue has dried, carefully apply grout to fill in the spaces between the tiles. Finish off by sealing the coaster with a marble sealer for a polished look. Enjoy your handcrafted coasters!
How many mosaic tiles are needed for a coaster?
Looking to create a beautiful mosaic coaster? With a selection of 2 cm tiles, you’ll only need approximately 100 tiles to complete the project. Be sure to factor in some extra tiles for cutting and potential wastage during the process. With these simple materials, you can easily craft a stunning and functional coaster for your home or to give as a thoughtful gift.
How can I make tile coasters waterproof?
To make tile coasters waterproof, start by choosing a sealant that is specifically designed for tiles. Apply a thin, even coat of the sealant onto the surface of the tile using a brush or sponge. Make sure to cover the entire tile, including the edges, to create a protective barrier against moisture. Allow the sealant to dry completely before using the coasters.
Once the sealant has dried, repeat the process with a second coat to ensure maximum protection. This will help to prevent water from seeping into the pores of the tile and causing damage over time. Be sure to follow the manufacturer’s instructions for drying times and any additional steps that may be required for optimal waterproofing.
After applying the second coat of sealant, allow the tile coasters to cure for at least 24 hours before using them. This will give the sealant enough time to fully set and provide a durable, waterproof finish. With proper maintenance and regular reapplication of sealant as needed, your tile coasters will remain waterproof and continue to protect your surfaces for years to come.
Create Your Own Stunning Mosaic Coasters
Looking to add a touch of creativity to your home decor? Why not try making your own stunning mosaic coasters! This DIY project is not only fun and rewarding, but it also allows you to showcase your unique style and personality. With just a few simple materials and a bit of imagination, you can create beautiful coasters that are sure to impress your guests.
To get started, gather your supplies which may include small tiles, glass beads, adhesive, grout, and a set of plain coasters. Begin by arranging your chosen materials in a pattern or design of your choice on the coaster. Once you are satisfied with the layout, carefully glue each piece into place. Allow the adhesive to dry completely before applying grout to fill in the gaps between the tiles. Wipe away any excess grout and let it set before sealing your coasters for a polished finish.
Whether you prefer a bold and colorful design or a more subtle and elegant look, the possibilities are endless when it comes to creating your own mosaic coasters. Not only are these coasters functional and practical, but they also serve as a beautiful piece of handmade art that you can proudly display in your home. So unleash your creativity and get ready to impress with your one-of-a-kind mosaic coasters!
Master the Art of Mosaic Coaster Making
Unlock your creativity and learn the intricate art of mosaic coaster making with our step-by-step guide. From selecting the perfect tiles to mastering the technique of cutting and arranging them, you’ll soon be creating stunning coasters that are both functional and beautiful. Let your imagination run wild as you experiment with different colors and patterns to craft unique pieces that will impress your guests and add a touch of style to your home decor. Whether you’re a beginner looking to explore a new hobby or a seasoned crafter seeking to enhance your skills, mastering the art of mosaic coaster making is sure to bring endless hours of joy and satisfaction.
Easy Steps to Crafting Beautiful Mosaic Coasters
Create stunning mosaic coasters with these easy steps. Start by gathering your materials: small tiles, adhesive, grout, and coasters. Next, arrange the tiles in a pattern of your choice on the coaster, securing them with adhesive. Once dry, apply grout to fill in the gaps between the tiles, wiping away any excess. Let it dry, and voila! You have a beautiful mosaic coaster to showcase in your home. These simple steps will have you crafting gorgeous coasters in no time.
Get creative and add a personal touch to your home decor with these DIY mosaic coaster tutorials. With just a few simple materials and some creativity, you can create beautiful and functional coasters that are sure to impress your guests. Whether you’re a beginner or an experienced crafter, these tutorials offer something for everyone. So why not give it a try and add a pop of color and style to your coffee table today?
